Understanding the Procedure
What Is Cosmetic Eyeliner Tattooing?
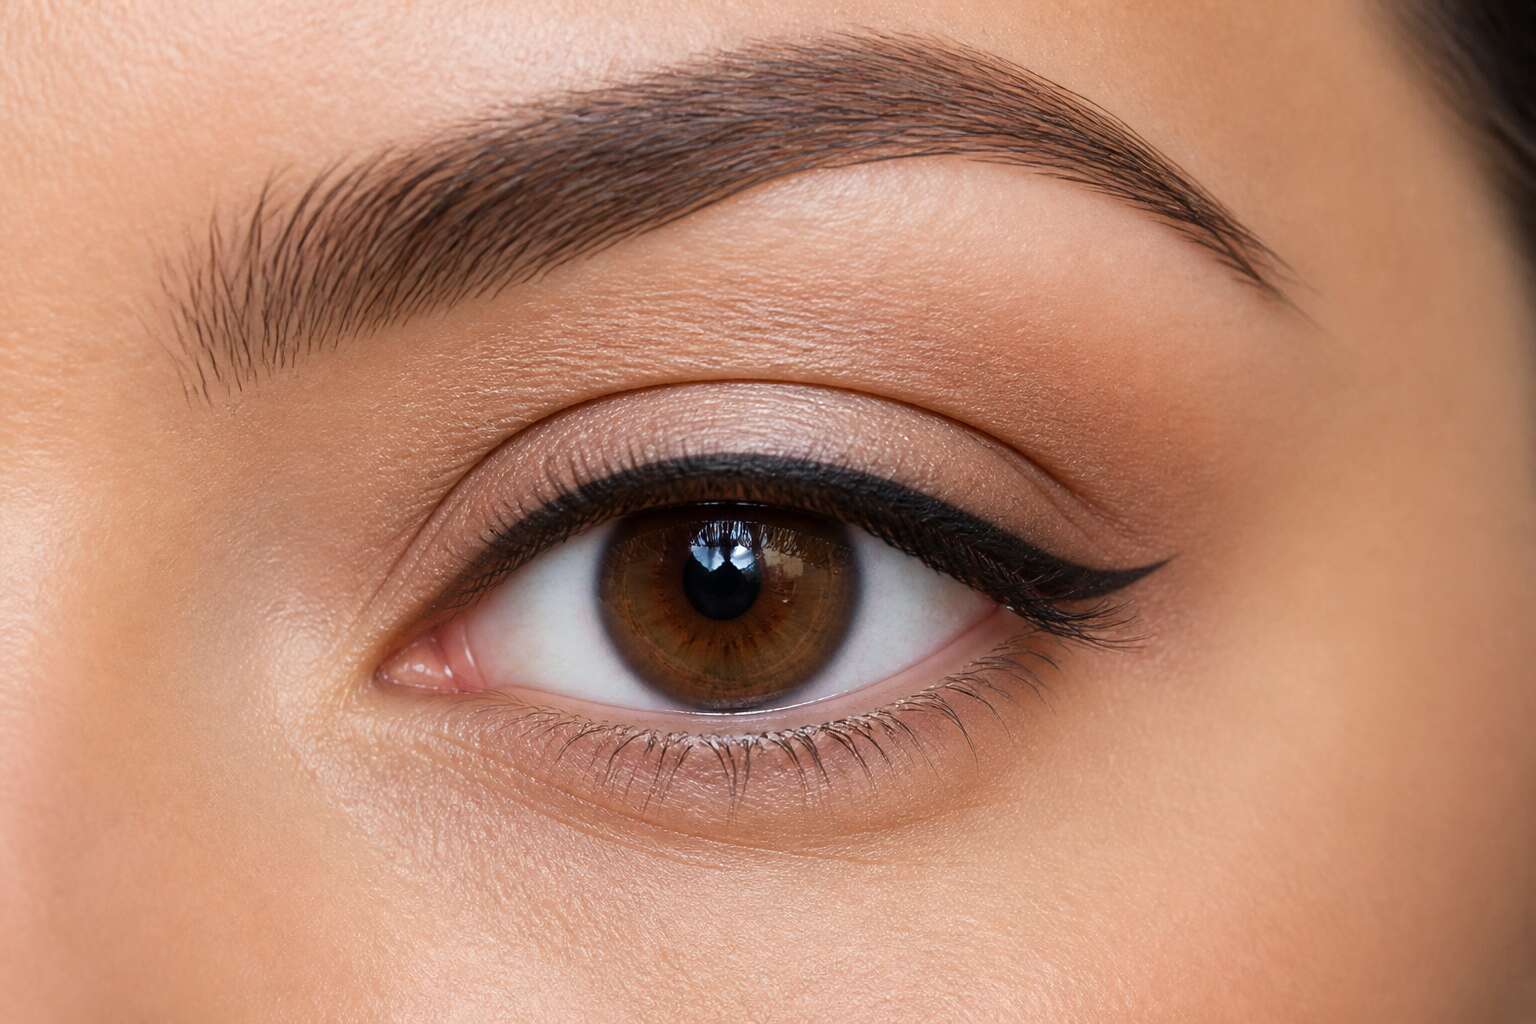
Cleopatra never queued for a salon chair, but the urge for permanently lined eyes is ancient. Cosmetic eyeliner tattooing is micropigmentation, where a technician deposits pigment along the lash line using a fine needle. No more fumbling with a pencil! The machine delivers symmetrical strokes that survive a rainy Joburg afternoon or a beach day in Cape Town.
A session runs about an hour:
- Numbing cream sits for twenty minutes.
- The permanent eyeliner dye is inserted into the upper dermal layer.
- You heal for a week, then the true colour settles.
Depth matters. Too deep, and the pigment blurs. Too shallow, and it fades. I’ve seen both outcomes, and the difference is the technician’s skill. Do your homework before you sit down.
How It Differs From Traditional Eyeliner
Traditional eyeliner is applied every morning. Permanent eyeliner dye is applied once. That single distinction changes the procedure entirely. A pencil glides across the skin. The tattoo machine does not glide. It insists, vibrating with a fine needle, depositing pigment into the upper dermal layer where creams and oils cannot reach.
The differences surface in daily life:
- Traditional eyeliner sits on the epidermis, vulnerable to sweat, tears, and humidity.
- Permanent eyeliner dye remains beneath the surface, stable through a Joburg summer or a Cape Town winter.
- Traditional eyeliner requires a steady hand and a mirror. Permanent eyeliner dye requires a skilled technician and one hour of patience.
Healing offers another contrast. Traditional eyeliner fades by nightfall. Permanent eyeliner dye crusts, flakes, then settles into its true colour over a week. The line becomes part of the skin, not a coating on it.
Who Is a Good Candidate?
Over two thousand procedures are performed monthly in South Africa. The demand is real. Understanding the procedure begins with the technician’s consultation. They measure your eye’s natural symmetry and discuss pigment depth. Once approved, a numbing cream is applied. Then the permanent eyeliner dye is placed using a rotary pen. This pen deposits colour in a series of microdots. The process repeats until the line is solid. Most sessions end within sixty minutes.
Who is a good candidate? Not everyone. You need good general health and no active eye irritation. Also:
- No open wounds near the lash line
- No history of allergic reactions to pigments
- Realistic expectations about colour settling
If you swim regularly or use oily eye creams, the permanent eyeliner dye will fade faster. These factors matter.
Preparing for Your Appointment
Choosing a Qualified Technician
Preparing for your appointment is straightforward but often overlooked. Skip caffeine for twenty-four hours beforehand, as it can make the skin more reactive. Arrive with a bare eye area, no makeup, no lash extensions. Your technician needs to see your natural lash line clearly to map the pigment placement effectively. You should also plan transport, since your eyes may feel sensitive for several hours afterward.
Choosing a qualified technician deserves the same care you would give any medical decision. Ask for certification and review their portfolio with a critical eye. Confirm they follow strict hygiene protocols using single use needles and fresh pigment pots. I always recommend requesting a patch test with the permanent eyeliner dye before committing. Before booking, ask direct questions:
– How many years have you performed this procedure?
– Do you use topical anaesthetic, and is it safe for your skin type?
– What is your revision policy if the permanent eyeliner dye fades unevenly?
A reputable artist will answer openly and encourage the patch test without hesitation.
Questions to Ask During Consultation
The consultation determines how the entire procedure unfolds. Arrive with a clear idea of the look you want, but remain open to professional guidance. Bring reference photos and a list of medications you take regularly. Your technician needs this information to assess how the permanent eyeliner dye will interact with your skin.
The consultation is also your opportunity to examine the studio environment. Notice the cleanliness of the workspace and the way equipment is handled. Ask about the brand of permanent eyeliner dye they use and why they chose it. I always recommend asking about pigment chemistry, since different formulations react differently on various skin types.
Questions worth raising:
- What does the healing process feel like day by day?
- How soon can I resume my normal routine?
- What are the signs of a pigment reaction?
What to Avoid Before the Session
The hours before your appointment carry more weight than the procedure itself. Your skin accepts the permanent eyeliner dye based on how you treated it in the preceding days. I have seen pigment rejection trace back to a single glass of wine or an aggressive skincare routine.
Avoid anything that irritates, inflames, or thins the skin. The permanent eyeliner dye requires a calm, stable surface to bond with. An inflamed eyelid produces uneven results.
- No caffeine or alcohol 24 hours before the session
- No retinol, vitamin A derivatives, or acid exfoliants for one week
- No eyelash extensions, growth serums, or perms for two weeks
- No prolonged sun exposure on the eye area
Your technician will check the skin before starting. If they spot irritation, they will reschedule. Arrive with a bare face, clean lashes, and a steady system.
Skin Patch Testing and Allergies
Your allergy profile is a private map. A patch test reveals the terrain before pigment ever touches skin. The permanent eyeliner dye engages your immune system beyond the surface of your eyelids. A reaction can surface as swelling, itching, or delayed redness that appears days later, long after you have left the clinic.
A responsible technician will apply a small amount of pigment behind your ear or on your inner arm. Wait 48 hours. Observe. This simple act separates a confident procedure from a gamble.
Consider these signs during the observation period:
– Persistent redness that lasts beyond 24 hours
– Itching that intensifies rather than fades
– Bumps or raised texture at the test site
Your skin is the final authority. A patch test that shows nothing does not guarantee safety, but it narrows the field of unknowns. Respect the process. Your eyes carry the evidence.
The Application Process
Step-by-Step Breakdown of the Session
The sensation is often described as a light scratching rather than pain. That distinction matters, because the next hour shapes the line you will see every morning. The session follows a careful sequence.
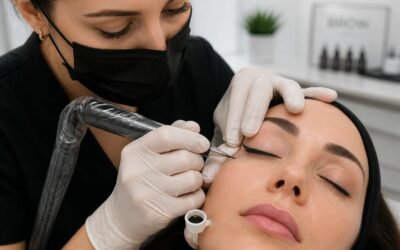
Your technician begins by cleansing the entire eye area to remove any trace of oil or makeup. A numbing cream is applied and left to work for roughly twenty minutes. Then comes the delicate work.
The permanent eyeliner dye is deposited using a fine needle that moves in short, precise strokes. Your eyes stay closed throughout. The technician checks the symmetry after every few passes, asking you to open your eyes briefly to assess the line.
A typical appointment includes:
1. Cleansing and mapping the desired shape.
2. Applying the numbing agent and waiting for it to take effect.
3. Depositing the permanent eyeliner dye in thin layers.
4. Wiping away excess pigment and applying a soothing balm.
Expect the entire visit to last about two hours. The colour will appear bolder for the first week, then soften as the skin heals.
Types of Pigments and Colors
The pigment selection happens before the needle ever touches your skin. Your technician should discuss undertones alongside colour. Black remains the classic choice, but soft browns and charcoal greys offer a gentler finish for fair complexions. The permanent eyeliner dye contains either iron oxide or carbon based pigments, each with different longevity profiles.
Application means layering the pigment in thin deposits. This builds intensity gradually instead of committing to a harsh first pass. Some clients choose a lash enhancement, others want a defined wing.
- Carbon black for depth
- Iron oxide browns for warmth
- Grey toners for neutral shading
For South African skin tones, the range spans deep espresso to soft taupe. The climate matters too. Sun exposure can alter pigment over time, so your technician will recommend a formulation suited to your daily life. The permanent eyeliner dye’s final colour also depends on your skin’s natural pH, so two people can heal to slightly different shades from the same pigment.
Techniques: Lash Line Enhancement vs. Winged Liner
Choosing between a lash line enhancement and a winged liner comes down to your tolerance for visible effort. The lash line technique deposits permanent eyeliner dye just between the lashes, creating density without a visible line. It is subtle, effective, and reads as naturally having great lashes.
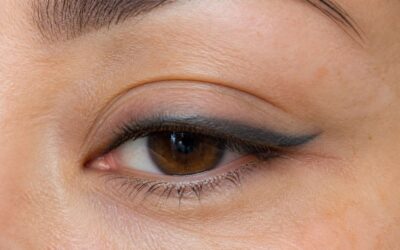
Winged liner demands commitment. Your technician flicks the pigment outward, tracing the eye’s natural lift. The result ranges from a demure kitten flick to a full dramatic wing. Some clients request a sharp flick, while others prefer a soft smudge that blends into the lash line.
- Lash enhancement: invisible line, maximum impact
- Winged liner: visible drama, needs a steady hand
Both techniques require precision, but healing differs. A winged tip has more surface area, meaning more swelling and a longer wait for the permanent eyeliner dye to settle. Lash line work heals faster, but you must avoid rubbing your eyes during the first week.
Pain Management and Numbing Options
The needle does not feel like a needle. Most clients describe a tiny, insistent scratching along the lash line, the kind that makes your teeth ache. Then the numbness arrives. The technician applies a topical anaesthetic, waits twenty minutes, and the scratching becomes a ghost sensation, present but distant.
The permanent eyeliner dye application then proceeds in near silence. Some clients feel a dull vibration. Others feel nothing at all. Your tolerance depends on sleep, caffeine intake, and your general sensitivity. We once had a client fall asleep mid-procedure. That is rare, but it happens.
- Numbing options: topical cream, gel, or a second anaesthetic pass when sensitivity returns
- Sharp pain is a signal, not a punishment. Ask for a reapplication immediately!
Swelling after the session is a separate matter, handled with cold compresses. The permanent eyeliner dye itself is inert. The process is brief. It ends quickly. The results last years.
Duration and Number of Sessions
Most permanent eyeliner dye sessions fit comfortably into a ninety minute block. The needle work, the actual painting of pigment, takes under an hour. The remainder disappears into numbing, measuring, and the quiet effort of keeping your eyes open. We find that well rested clients finish faster. Caffeinated clients twitch more. One fidget can reset the alignment process.
Sessions are fewer than you might fear. One primary appointment delivers the permanent eyeliner dye, and a single touch up at the eight week mark handles any fading. That is the standard schedule for most skin types. Here is the typical sequence:
- Initial application: the full lash line treatment
- Follow up: a short correction pass for uniform colour
Two visits. Then the mirror stays clear for years.
Aftercare and Healing
Immediate Post-Treatment Care
The first 24 hours after your permanent eyeliner dye feel less like beauty maintenance and more like a very specific kind of hostage negotiation. Your eyelids are swollen, slightly tender, and absolutely not interested in your usual routine. I promise this phase passes, but how you behave right now determines the final result.
Your immediate task is to let the pigment settle. That means zero water contact, zero rubbing, and zero lash curlers. Do not even look at them sideways. The healing process begins the moment you step out of the studio, and your job is to be boringly obedient.
- Keep the area dry for at least 24 hours
- Avoid sweat and steam entirely
- Skip eye makeup until the skin flakes
That flaking stage is normal. Do not pick at it, or you will pull out the permanent eyeliner dye along with the scab. Let it fall naturally, usually within five to seven days, and your liner will settle into its true colour.
Healing Timeline and What to Expect
Most clients expect a dramatic transformation overnight. The reality is slower and steadier. The permanent eyeliner dye needs time to bond with the skin, and the healing timeline has distinct phases that surprise almost everyone.
Here is what you can expect:
- Days 1 to 2: the liner looks dark, thick and slightly matte. Swelling hides the true colour.
- Days 3 to 7: flaking begins. Patches appear uneven. This is the pigment settling, not failing.
- Days 8 to 14: the surface skin regenerates and the colour softens significantly.
- Weeks 3 to 6: the permanent eyeliner dye reaches its final shade as the deeper layers finish healing.
The flaking phase creates the most anxiety. People see uneven colour and assume the procedure failed. It did not. The pigment sits below the surface and only reveals itself once the dead skin clears. True healing takes four to six weeks, so judge nothing before then. Patience is the entire game here.
Do’s and Don’ts During Recovery
Recovery demands restraint. The permanent eyeliner dye settles best when you treat the area as fragile. Resist the urge to rub, pick, or scrub. Any interference can drag pigment out before it anchors.
Keep the eyelid dry for the first week. Water breaks down the pigment bond. Sweat, tears, and steam all interfere. Use a clean, damp cloth for the face and avoid the eye contour entirely.
- Sleep on your back with an extra pillow
- Wear sunglasses outdoors to shield from dust
- Apply only the ointment your technician provided
Skip makeup, eyelash curlers, and tinted creams. The skin is a thin veil over the pigment. Pressure or chemicals pull the colour away. You will see the true shade only after full recovery, which takes four to six weeks.
Long-Term Maintenance and Touch-Ups
Once the settling period passes, the permanent eyeliner dye enters its long term phase. Sun exposure in South Africa is fierce, and UV rays fade pigment over time. A daily SPF around the eye area, applied gently, preserves the richness.
Most people need a touch up between twelve and eighteen months after the initial session. This refreshes the pigment and sharpens any blurred edges. The second session is quicker than the first, since the technician works with an existing base.
Consider these maintenance habits:
- Wear sunglasses with UV protection outdoors
- Use an oil free makeup remover around the eyes
- Avoid harsh chemical peels near the brow bone
The permanent eyeliner dye fades differently for each skin type. Oily skin loses pigment faster. Schedule annual reviews with your technician to assess colour depth. If the line turns grey, book a touch up before the pigment disappears entirely.
Risks, Safety, and Removal
Potential Side Effects and Complications
Permanent eyeliner dye is a commitment that outlasts many relationships, which is why understanding the risks matters before you book. Your eyelid skin is thin and unforgiving, so complications like pigment migration or granulomas can turn a beauty treat into a dermatological drama. Safety hinges on sterile equipment and reputable pigments, but even then, your body might stage a rebellion.
Common side effects include swelling, crusting, or asymmetrical fading. Rarely, infection or scarring appears. Removal is the tricky part. Laser treatments can react unpredictably with certain dyes, and saline removal requires multiple sessions. Some pigments contain metallic oxides, which complicate things further.
- Always request a pigment safety data sheet
- Avoid numbing creams with epinephrine
- Check technician credentials with health authorities
The permanence means you are betting on your future taste. If removal becomes necessary, expect a series of consultations and a hefty bill. Permanent eyeliner dye offers convenience, but the exit strategy demands equal attention.
How to Identify an Unsafe Practitioner
An unsafe practitioner often reveals themselves before the needle touches your eyelid. In South Africa, some studios operate without health department certification. They refuse to show you the pigment safety data sheet for the permanent eyeliner dye they plan to use. That is your first warning.
Watch how they handle hygiene. Sterile needles must come from sealed packets. Gloves should be fresh. If the technician hesitates when you ask about autoclave logs, walk away. Also check their portfolio for uneven lines or blowouts, which signal poor technique.
- No written consent form
- Vague answers about pigment brands
- Rushed patch test or none at all
Your instincts matter. A practitioner who pressures you to skip the patch test is prioritizing money over your safety. Remember that permanent eyeliner dye interacts with your skin for years. Choose someone who treats that responsibility seriously.
Laser Removal and Correction Options
The needle heals in weeks. The regret can last decades. The risks of permanent eyeliner dye only surface years later, and in South Africa, dermatologists routinely treat pigment migration alongside foreign body reactions. These complications rarely resolve on their own.
Safety begins with pigment chemistry. Carbon black remains stable in tissue. Red and brown pigments contain iron oxide, which disrupts laser removal. That knowledge matters if you ever reconsider your choice.
Removal is the demanding part. Laser treatments break down dark permanent eyeliner dye effectively, but lighter pigments reflect the wavelength instead of absorbing it. Correction options include:
- Saline removal for immediate fading
- Q-switched laser for stubborn pigment
- Camouflage re-pigmentation for tone mismatch
Each option carries its own scarring risk. Nobody plans for removal when they book the session, yet understanding it sharpens every decision you make upfront.
Cost Considerations and Insurance
The permanent eyeliner dye you loved at 25 can become a fiscal headache at 40. Removal costs in South Africa vary wildly, from R1,500 per session to R4,000, and most technicians expect three to five sessions. Insurance rarely touches this, because medical aids classify it as elective regret. Safety, though, affects your wallet directly. A pigment migration that demands a dermatologist’s intervention might get partial cover, but only after you argue convincingly.
I’ve seen clients pay more for removal than the original procedure. That irony stings. Consider the typical price breakdown:
- Consultation fees: R500 to R900, often non-refundable
- Laser removal: R1,800 to R3,500 per visit
- Saline fading: R1,200 to R2,000 per session
- Post-treatment creams: R200 to R600
Insurance rarely steps in unless infection or scarring occurs. Even then, you’ll face exclusions. Your best financial move is understanding that permanent eyeliner dye is a permanent purchase with hidden maintenance costs.

0 Comments